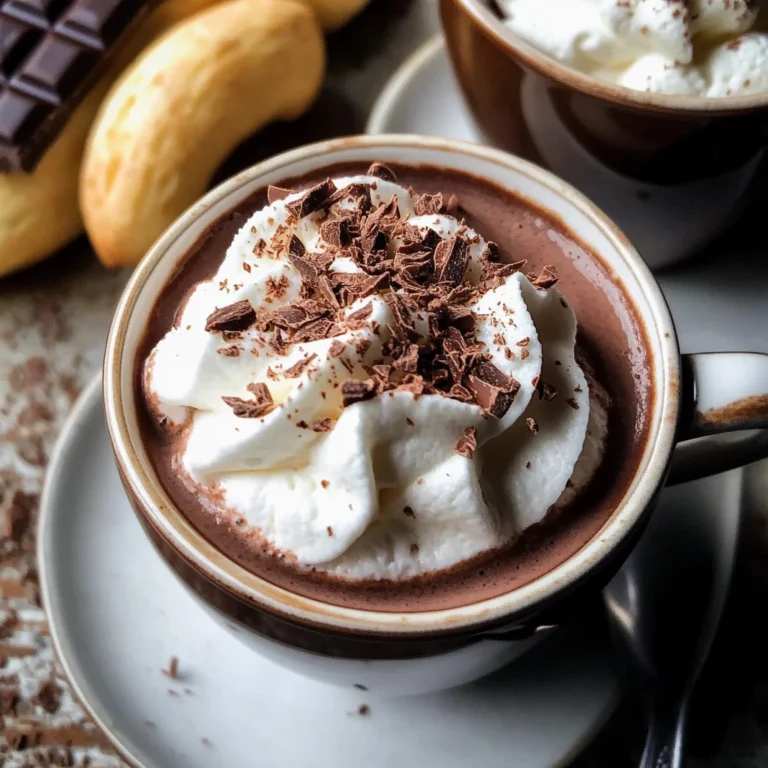
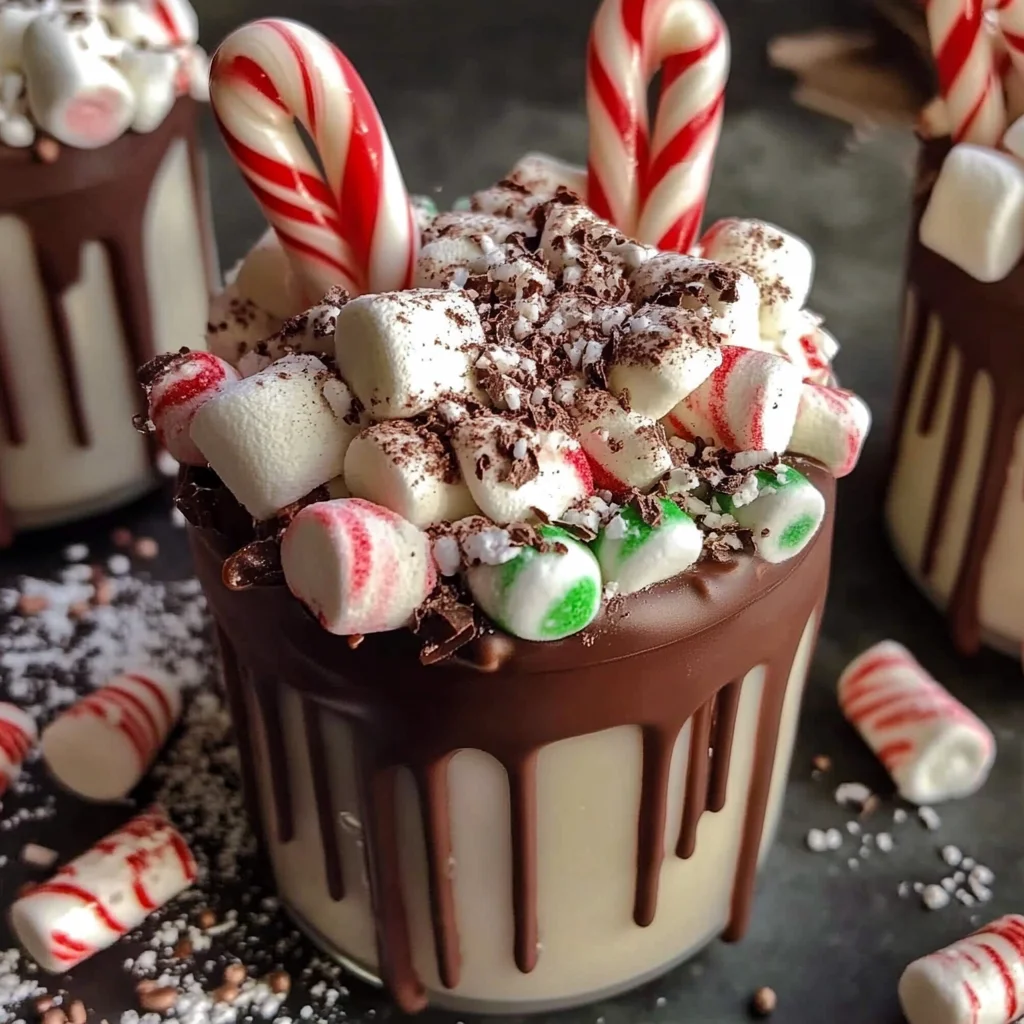
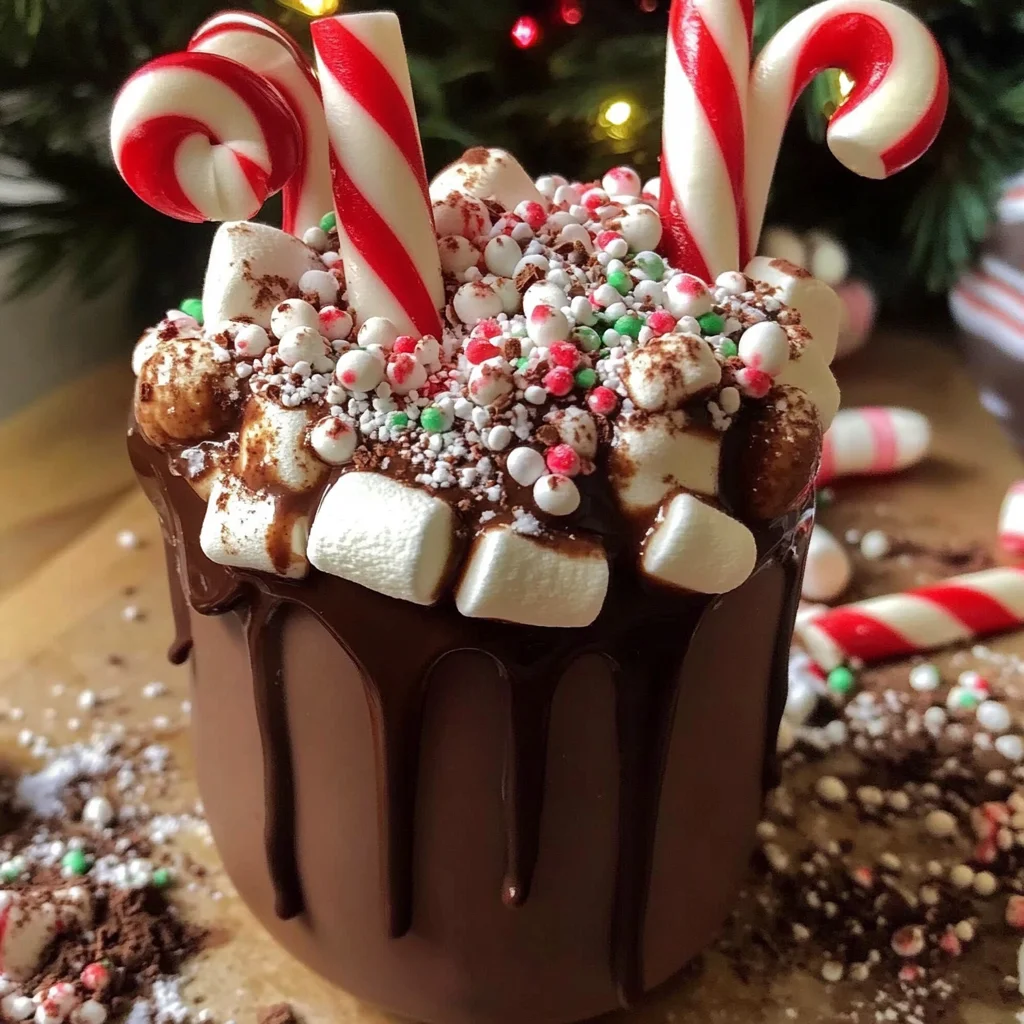
Chocolate Hot Cups
If you’re looking for a fun and delightful treat that will warm your heart and bring smiles to your family, you’ve come to the right place! These Chocolate Hot Cups are not only delicious but also incredibly easy to make. They are perfect for cozy nights at home or as a sweet addition to any gathering. Imagine sipping hot chocolate from a homemade chocolate cup—what could be better?
This recipe is special because it combines the joy of sweet treats with the comfort of warm beverages. Plus, it’s a great way to get the kids involved in the kitchen, making memories while they create their very own chocolate cups!
Why You’ll Love This Recipe
- Super simple: The steps are easy enough for anyone to follow, making it a great choice even on busy nights.
- Family-friendly fun: Kids will love helping out and decorating their own cups!
- Make-ahead magic: Prepare these Chocolate Hot Cups in advance for parties or movie nights.
- Deliciously customizable: Use your favorite toppings and flavors for a personal touch.
Ingredients You’ll Need
These Chocolate Hot Cups come together with simple, wholesome ingredients that are sure to please everyone. Let’s gather what you need:
For the Cups
- Disposable cups
- Melted milk chocolate
For the Toppings
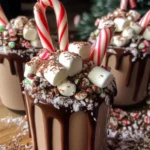
- Candy canes
- Cocoa powder
- Mini vegan marshmallows
- Granulated sugar
Variations
What I love about this recipe is its flexibility! You can switch things up based on what you have or your favorite flavors. Here are some fun ideas:
- Add some spice: Mix in a pinch of cinnamon or nutmeg for a cozy twist.
- Go nutty: Top your cups with crushed nuts like almonds or hazelnuts for added crunch.
- Mix up the chocolate: Try dark chocolate or white chocolate for different flavor profiles.
- Fruit infusion: Add dried fruits like cranberries or raisins inside the cup for a fruity surprise.
How to Make Chocolate Hot Cups
Step 1: Melt the Chocolate
Slowly melt the chocolate using a double boiler or microwave set on low power. This method ensures that your chocolate melts evenly without scorching. It’s important to keep an eye on it so that it doesn’t burn; we want smooth and silky chocolate for our cups!
Step 2: Create the Chocolate Cups
Once melted, pour the chocolate into your disposable cups. Swirling them helps coat the sides thoroughly, creating sturdy walls for our cups. Let them set completely before repeating this process to add stability—this is key for holding our delicious toppings later!
Step 3: Assemble Your Treats
Carefully remove the hardened chocolate cups from their molds once set. Pour in more melted chocolate and gently place candy canes inside each cup. This adds both flavor and decoration! Allow everything to dry before moving on.
Step 4: Top It Off
Now comes the fun part! Add about two teaspoons of cocoa powder into each cup, followed by mini vegan marshmallows. A drizzle of melted chocolate over the marshmallows will help them stick nicely—after all, who doesn’t love extra chocolate?
Step 5: Final Touches
Decorate with even more melted chocolate and sprinkle granulated sugar over everything for an extra touch of sweetness. If you’re feeling adventurous, dip the edges of your cups back into melted chocolate for a beautiful finish!
Step 6: Enjoy Your Creation
To enjoy these delightful Chocolate Hot Cups, simply place one in hot milk, wait a moment, then stir well. Watch as it transforms into a warming drink that’s perfect for chilly evenings!
There you have it—the ultimate recipe for Chocolate Hot Cups! I hope you find joy in making them as much as I do sharing them with you!
Pro Tips for Making Chocolate Hot Cups
Creating your own Chocolate Hot Cups is a delightful experience, and these tips will help you achieve the perfect results every time!
-
Choose Quality Chocolate: Using high-quality chocolate will enhance the flavor of your cups. It melts better and gives a richer taste, making your hot chocolate experience even more indulgent.
-
Use a Double Boiler: Melting chocolate over a double boiler allows for gentle heat, preventing it from burning. This method ensures a smooth, shiny finish that looks beautiful in your cups.
-
Let Each Layer Set Properly: Allowing each layer of chocolate to set before adding the next helps create sturdy cups. This step is crucial for ensuring that your cups hold their shape when filled with hot milk.
-
Experiment with Flavors: Feel free to add flavors like peppermint extract or vanilla to the melted chocolate for an extra twist. This can make your hot chocolate truly unique and exciting!
-
Keep Them Cool: Store your finished Chocolate Hot Cups in a cool place until you’re ready to serve them. This prevents any melting or deformation, keeping them looking fabulous for when guests arrive.
How to Serve Chocolate Hot Cups
Presenting your Chocolate Hot Cups can be just as fun as making them! Here are some creative ideas to make serving an enjoyable experience.
Garnishes
- Mini Vegan Marshmallows: These fluffy delights not only add texture but also charm to your cups.
- Crushed Candy Canes: Sprinkle these on top for a festive touch and a refreshing peppermint flavor that complements the chocolate beautifully.
Side Dishes
-
Fresh Fruit Platter: A colorful assortment of berries, bananas, and apples provides a refreshing counterpoint to the rich sweetness of the hot chocolate.
-
Vegan Cookies: Pairing with soft vegan cookies creates a delightful treat combination. They’re perfect for dipping into your warm drink!
-
Nut Mix: A simple bowl of lightly salted nuts adds a crunchy texture that balances out the creamy sweetness of the hot cups.
-
Popcorn: Offer some lightly salted or caramel popcorn on the side for a fun and crunchy contrast that everyone loves!
With these serving suggestions and pro tips, your Chocolate Hot Cups will surely impress everyone at your next gathering! Enjoy this cozy treat while creating wonderful memories with family and friends.
Make Ahead and Storage
These Chocolate Hot Cups are not only delightful but also perfect for meal prep! You can prepare them in advance to ensure that you have a sweet treat ready whenever the craving strikes.
Storing Leftovers
- Store any leftover chocolate cups in an airtight container at room temperature for up to one week.
- If the weather is particularly warm, consider refrigerating them to maintain their shape and prevent melting.
Freezing
- To freeze, place the chocolate cups in a single layer on a baking sheet and freeze until solid.
- Once frozen, transfer them to a freezer-safe bag or container. They can be stored for up to three months.
Reheating
- When you’re ready to enjoy your frozen chocolate cups, allow them to thaw at room temperature for about 30 minutes.
- For a warm serving, place the cup directly into hot milk and let it sit for a few minutes before stirring.
FAQs
Here are some common questions you might have about making Chocolate Hot Cups:
Can I use dark chocolate instead of milk chocolate for Chocolate Hot Cups?
Absolutely! Dark chocolate will add a rich flavor and pair beautifully with the sweetness of the marshmallows and candy canes.
How do I make Chocolate Hot Cups vegan-friendly?
This recipe is already vegan-friendly as it uses melted milk chocolate that does not contain any animal-derived ingredients. Just ensure that all your other components, like marshmallows, are vegan-certified!
What can I use instead of candy canes in my Chocolate Hot Cups?
You can substitute crushed peppermint candies or even nuts for a different flavor profile while still adding a delightful crunch!
How long do Chocolate Hot Cups stay fresh?
When stored properly in an airtight container, Chocolate Hot Cups can stay fresh for up to one week at room temperature.
Can I customize my Chocolate Hot Cups toppings?
Definitely! Feel free to get creative with toppings like sprinkles, crushed cookies, or even flavored syrups for a fun twist on this classic treat.
Final Thoughts
I hope you enjoy making these charming Chocolate Hot Cups as much as I do! They’re perfect for cozy nights in or as a fun project with friends and family. With their delightful taste and festive presentation, they’re sure to bring smiles all around. Happy cooking, and don’t hesitate to try out different toppings or variations!
Chocolate Hot Cups
Indulge in the delightful experience of Chocolate Hot Cups, a fun and interactive treat perfect for cozy nights or festive gatherings. These charming homemade chocolate cups are not only easy to create but also allow for customization with your favorite toppings and flavors. Imagine savoring rich hot chocolate from a deliciously crafted chocolate cup, all while making sweet memories with family and friends. With simple ingredients and straightforward steps, everyone can join in the fun of creating their own personalized dessert cups. Whether you’re looking for a comforting winter treat or a unique dessert for your next celebration, these Chocolate Hot Cups are sure to impress!
- Prep Time: 20 minutes
- Cook Time: 10 minutes
- Total Time: 30 minutes
- Yield: 4 servings
- Category: Dessert
- Method: No-Bake
- Cuisine: American
Ingredients
- Disposable cups
- Melted milk chocolate
- Candy canes
- Cocoa powder
- Mini vegan marshmallows
- Granulated sugar
Instructions
- Melt the chocolate using a double boiler or microwave on low power until smooth.
- Pour melted chocolate into disposable cups, swirling to coat the sides thoroughly. Let them set completely.
- Once hardened, gently remove the chocolate cups from their molds and pour in additional melted chocolate. Place candy canes inside for flavor and decoration.
- Add cocoa powder and mini vegan marshmallows on top, securing them with a drizzle of melted chocolate.
- Finish with more melted chocolate and sprinkle granulated sugar over the top for sweetness.
Nutrition
- Serving Size: 1 Chocolate Hot Cup (60g)
- Calories: 320
- Sugar: 28g
- Sodium: 15mg
- Fat: 18g
- Saturated Fat: 10g
- Unsaturated Fat: 8g
- Trans Fat: 0g
- Carbohydrates: 36g
- Fiber: 2g
- Protein: 3g
- Cholesterol: 0mg