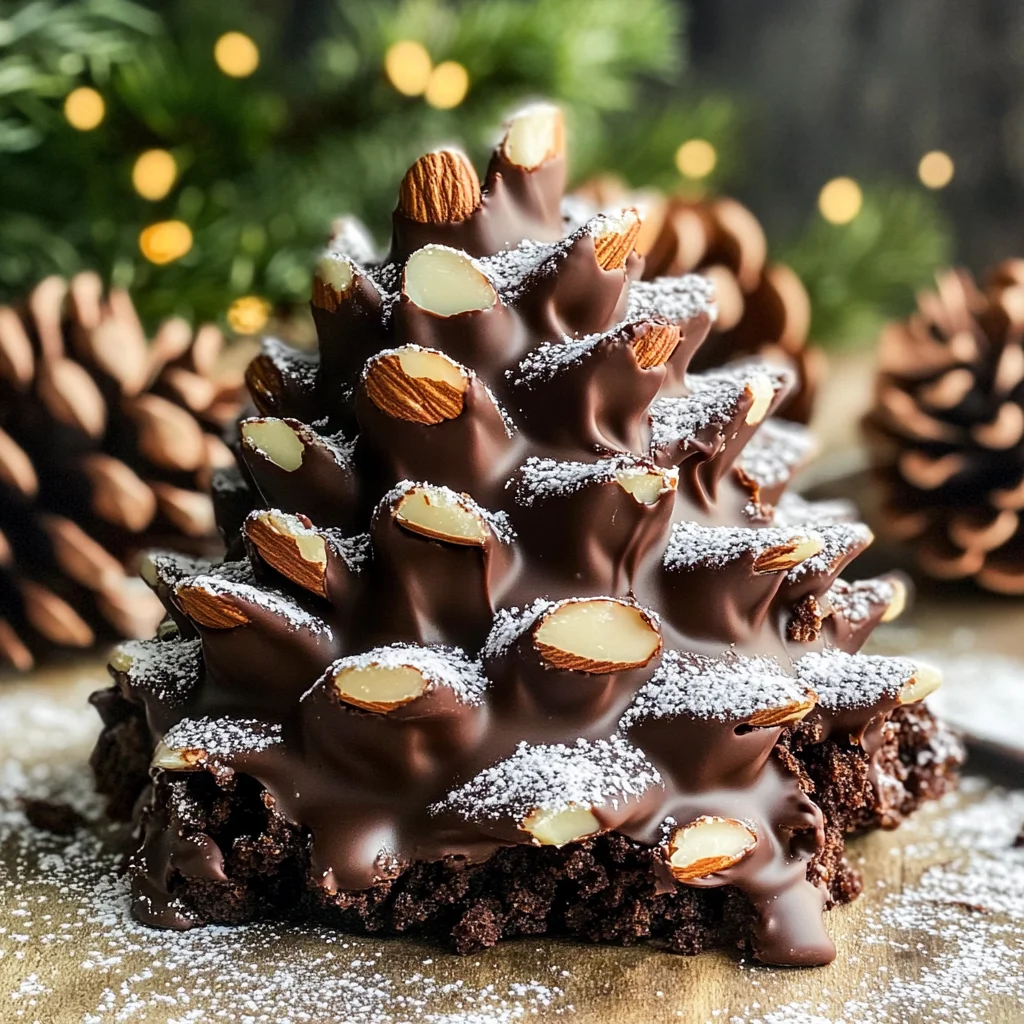
Viral Pine Cone Brownies
If you’re looking for a delightful dessert that sparks joy and creativity, look no further than these Viral Pine Cone Brownies! They are not just adorable; they are also a fun way to bring everyone together in the kitchen. You might think they sound complicated, but I promise they are easy to whip up. Plus, they make the perfect treat for holiday gatherings or any time you want to impress friends and family with something special.
What I love most about these brownies is how customizable they are. Whether you’re gathering with loved ones or just creating sweet memories with your little ones, this recipe is sure to be a hit. So roll up your sleeves, and let’s get baking!
Why You’ll Love This Recipe
- Super Simple: Using a boxed brownie mix means you can skip some steps and still enjoy delicious brownies.
- Family Fun: Shaping the cones and decorating them is an activity everyone will love—perfect for all ages!
- Diet-Friendly: These brownies are gluten-free, dairy-free, egg-free, and refined sugar-free, making them a great choice for various dietary needs.
- Festive Touch: The pine cone shape adds a whimsical flair that’s perfect for holiday celebrations or cozy get-togethers.
- Make Ahead: Prepare these ahead of time and store them in the fridge; they stay delicious for days!
Ingredients You’ll Need
Let’s gather our simple and wholesome ingredients! You’ll find that everything you need is easy to find at your local grocery store. Whether you’re making these for a festive occasion or just because, each ingredient contributes to the deliciousness of these Pine Cone Brownies.
For the Brownie Base
- 1 GF/Grain free boxed brownie mix (I love Simple Mills!)
- Ingredients required by the brownie mix
For Decoration
- 1 cup sliced almonds (or sub with cereal flakes)
- 9 oz chocolate chips
- 1 tsp coconut oil
- Powdered Sugar or Powdered Monk fruit (for dusting)
Variations
This recipe is wonderfully flexible! Here are some fun ways to switch things up while keeping that pine cone charm intact:
- Add Some Flavor: Mix in your favorite dairy-free extract like vanilla or almond into the brownie batter before baking.
- Nutty Twist: Swap out the sliced almonds for chopped walnuts or pecans for a different flavor profile.
- Dairy-Free Drizzle: After coating with chocolate, drizzle melted nut butter on top for an extra layer of deliciousness!
- Sprinkle Some Color: Use colored sprinkles along with powdered sugar on top to make these festive for any celebration!
How to Make Viral Pine Cone Brownies
Step 1: Prepare Your Brownie Base
Start by making your brownie mix according to the instructions on the box. Be careful not to overbake them; you want them gooey in the middle so they’re easy to shape later. Let them cool down slightly—about 10 minutes should do—so they remain soft but not too hot to handle.
Step 2: Shape Your Cones
Once your brownie mixture has cooled enough, it’s time to get creative! Form approximately 12 cone shapes from the brownie mixture as if you were shaping cake pops. This step is where your imagination can run wild—you want them to resemble cute little pine cones!
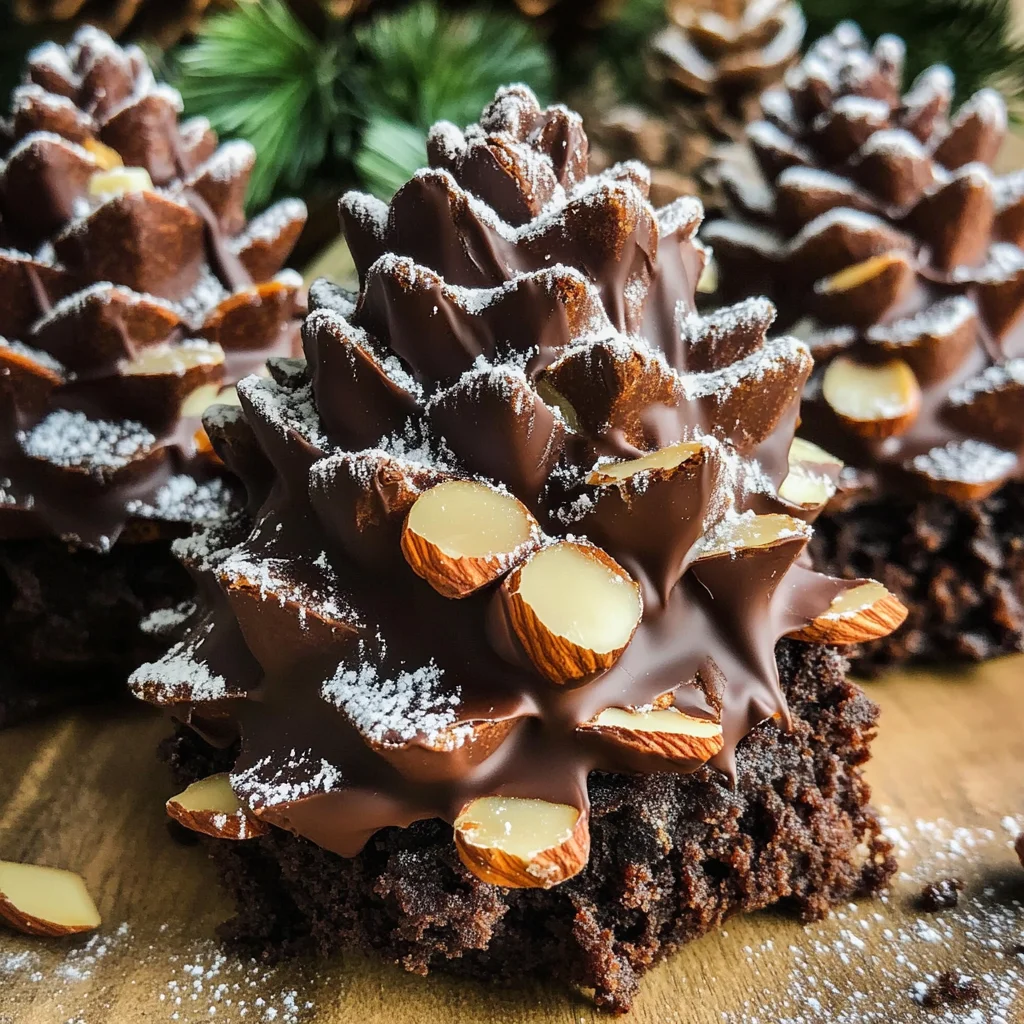
Step 3: Add Almond Scales
Now comes the fun part! Carefully place your almond slices (or cereal flakes) around and on top of each brownie cone. This will give them that beautiful pine cone appearance. Just be gentle—they’re fragile little things!
Step 4: Freeze Your Pine Cones
Line a sheet pan with parchment paper and place your decorated pine cones on it. Pop them into the freezer for about 30 minutes. Freezing helps firm them up so they’re easier to coat.
Step 5: Melt Your Chocolate
While your pine cone brownies chill, melt your chocolate chips along with coconut oil. You can do this in a microwave-safe bowl in 30-second intervals or use a double boiler. Stir until smooth—it should be velvety and ready for dipping!
Step 6: Coat Your Pine Cones
After freezing, take out those adorable brownie cones and carefully dip each one into the melted chocolate until well coated. Place them back on the parchment paper so they can set properly.
Step 7: Finish with Powdered Sugar
For that frosted look reminiscent of snow on pine cones, sprinkle some powdered sugar or powdered monk fruit over the top before serving. Now they’re ready to enjoy!
And there you have it—Viral Pine Cone Brownies that are sure to bring smiles all around! Happy baking!
Pro Tips for Making Viral Pine Cone Brownies
Making these delightful Pine Cone Brownies can be a breeze with some handy tips to guide you through the process!
-
Use a quality brownie mix – Opting for a gluten-free and grain-free mix like Simple Mills ensures a deliciously moist base that holds up well when shaping into cones.
-
Form cones gently – When shaping the brownie mixture, be gentle to prevent cracking. A light touch allows you to create the perfect pine cone shape while keeping the brownies intact.
-
Chill before coating – Freezing the brownie cones for about 30 minutes makes them firmer and easier to coat in melted chocolate without losing their shape.
-
Experiment with toppings – Feel free to customize your pine cone decorations! Using different nuts or even edible glitter can add a whimsical touch that makes your treats even more festive.
-
Store properly – To keep your Pine Cone Brownies fresh, store them in an airtight container at room temperature for up to three days, or in the fridge for longer shelf life.
How to Serve Viral Pine Cone Brownies
Presenting your Viral Pine Cone Brownies can make them even more appealing! Here are some creative ideas to enhance your dessert’s charm.
Garnishes
- Powdered sugar dusting – A sprinkle of powdered sugar adds a snowy effect, making these brownies look extra festive.
- Chocolate drizzle – Drizzle some melted chocolate over the top for an elegant finish that also enhances the flavor.
- Fresh mint leaves – Adding a couple of mint leaves next to each brownie not only adds color but also introduces a refreshing contrast to the rich chocolate.
Side Dishes
- Vanilla coconut ice cream – The creamy texture and lightness of coconut ice cream balance the richness of the brownies, creating a delightful contrast.
- Fruit salad – A colorful mix of seasonal fruits provides freshness and complements the sweetness of the brownies perfectly.
- Coffee or herbal tea – Serving alongside a warm beverage can enhance the overall experience, as it contrasts nicely with the richness of the brownies.
- Chocolate-dipped strawberries – These add an extra touch of sweetness while keeping with the chocolate theme, making your dessert table look indulgent and appetizing.
With these serving suggestions and pro tips, you’re now ready to whip up these adorable Viral Pine Cone Brownies and share them with friends and family. Happy baking!
Make Ahead and Storage
These Viral Pine Cone Brownies are not only adorable but also perfect for meal prep! You can easily make them ahead of time, ensuring that you have a delightful treat ready for any occasion.
Storing Leftovers
- Keep the brownies in an airtight container at room temperature for up to 3 days.
- If you prefer them chilled, store them in the refrigerator for up to a week.
- Ensure that they are separated by parchment paper if stacked to prevent sticking.
Freezing
- Wrap each pine cone brownie individually in plastic wrap or aluminum foil.
- Place them in a freezer-safe bag or container, removing as much air as possible.
- They can be frozen for up to 2 months. Just remember to label with the date!
Reheating
- To enjoy them warm, simply place the brownies on a microwave-safe plate and heat for about 15-20 seconds.
- If reheating from frozen, allow them to thaw at room temperature before microwaving.
- Alternatively, you can warm them in the oven at 350°F (175°C) for about 5-10 minutes.
FAQs
If you have questions about making these delightful treats, you’re not alone! Here are some common inquiries.
What makes these Viral Pine Cone Brownies special?
These Viral Pine Cone Brownies stand out because they are not only visually stunning but also cater to various dietary needs. They’re gluten-free, dairy-free, egg-free, and refined sugar-free. Plus, they bring joy and creativity to your holiday celebrations!
Can I use a different type of nut instead of almonds?
Absolutely! While sliced almonds give great texture and flavor, feel free to swap them out with your favorite nut or seed. Chopped walnuts or sunflower seeds work wonderfully too!
How can I make my Viral Pine Cone Brownies more festive?
To amp up the festive vibe, consider adding edible glitter or colorful sprinkles on top after coating with chocolate. This little touch adds extra charm and fun—perfect for holiday gatherings!
Are these brownies suitable for kids?
Yes! These brownies are a great choice for kids since they are made without common allergens like eggs and dairy. Plus, decorating them can be a fun activity for children.
Final Thoughts
I hope you find joy in making these adorable Viral Pine Cone Brownies! They’re not just a dessert; they’re a delightful way to bring friends and family together during the holidays. Enjoy the process of creating this fun treat, and don’t hesitate to get creative with your toppings! Happy baking!
Viral Pine Cone Brownies
Indulge in the joy of baking with these adorable Viral Pine Cone Brownies! Perfect for holiday gatherings or a fun family activity, these brownies are both delightful and customizable. With a gluten-free, dairy-free, and refined sugar-free base, they cater to various dietary needs while delivering delicious flavor. Shaped like pine cones and covered in chocolate, these treats bring a whimsical touch to any dessert table. Get ready to impress your friends and family with this easy recipe that sparks creativity in the kitchen!
- Prep Time: 15 minutes
- Cook Time: 25 minutes
- Total Time: 40 minutes
- Yield: Approximately 12 servings 1x
- Category: Dessert
- Method: Baking
- Cuisine: American
Ingredients
- 1 GF/Grain-free boxed brownie mix
- Sliced almonds or cereal flakes for decoration
- 9 oz chocolate chips
- 1 tsp coconut oil
- Powdered sugar or powdered monk fruit for dusting
Instructions
- Prepare the brownie mix according to package instructions, avoiding overbaking.
- Once cooled slightly, shape the brownies into cone shapes (about 12).
- Decorate with sliced almonds or cereal flakes around each cone.
- Freeze decorated cones for 30 minutes.
- Melt chocolate chips with coconut oil until smooth.
- Dip each frozen cone into the melted chocolate until fully coated.
- Place on parchment paper and sprinkle powder sugar or powdered monk fruit before serving.
Nutrition
- Serving Size: 1 serving
- Calories: 180
- Sugar: 8g
- Sodium: 65mg
- Fat: 10g
- Saturated Fat: 5g
- Unsaturated Fat: 5g
- Trans Fat: 0g
- Carbohydrates: 20g
- Fiber: 2g
- Protein: 2g
- Cholesterol: 0mg